NSLayoutConstraintを使ってAutoLayoutをコードで書く
背景
AutoLayoutをxib上で使っているのだけれどxibでは表現できるAutoLayoutに限界があると思いコードで書く方法を調べたのでメモ。
サンプル
1.self.viewから左20,上20のマージンをとった位置にwidth100,height100の赤いViewを配置
    UIView *redView = [[UIView alloc] init];
    redView.backgroundColor = [UIColor redColor];
    redView.translatesAutoresizingMaskIntoConstraints = NO;
    [self.view addSubview:redView];
    NSLayoutConstraint *redLeftConstraint = [NSLayoutConstraint constraintWithItem:redView
                                                                         attribute:NSLayoutAttributeLeft
                                                                         relatedBy:NSLayoutRelationEqual
                                                                            toItem:self.view
                                                                         attribute:NSLayoutAttributeLeft
                                                                        multiplier:1
                                                                          constant:20];

    NSLayoutConstraint *redTopConstraint = [NSLayoutConstraint constraintWithItem:redView
                                                                     attribute:NSLayoutAttributeTop
                                                                     relatedBy:NSLayoutRelationEqual
                                                                        toItem:self.topLayoutGuide
                                                                     attribute:NSLayoutAttributeTop
                                                                    multiplier:1
                                                                      constant:20];

    NSLayoutConstraint *redWidthConstraint = [NSLayoutConstraint constraintWithItem:redView
                                                                       attribute:NSLayoutAttributeWidth
                                                                       relatedBy:NSLayoutRelationEqual
                                                                          toItem:nil
                                                                       attribute:NSLayoutAttributeNotAnAttribute
                                                                      multiplier:1
                                                                        constant:100];

    NSLayoutConstraint *redHeightConstraint = [NSLayoutConstraint constraintWithItem:redView
                                                                        attribute:NSLayoutAttributeHeight
                                                                        relatedBy:NSLayoutRelationEqual
                                                                           toItem:nil
                                                                        attribute:NSLayoutAttributeNotAnAttribute
                                                                       multiplier:1
                                                                         constant:100];

    [self.view addConstraints:@[redLeftConstraint, redTopConstraint, redWidthConstraint, redHeightConstraint]];


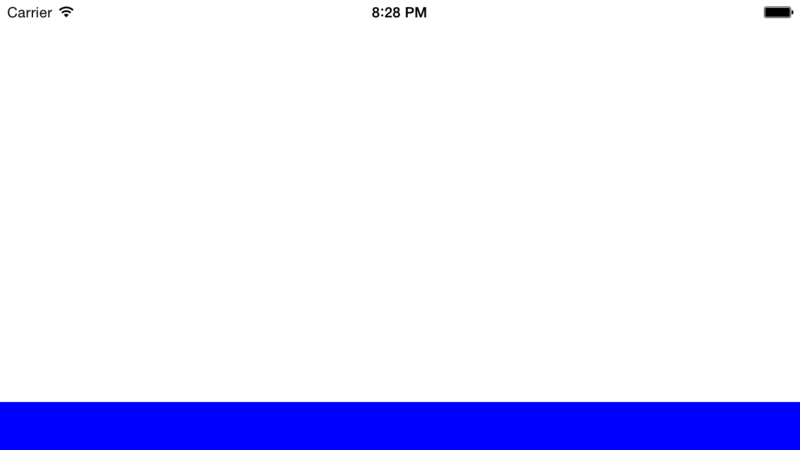
2.self.viewのbottom部分に幅=端末幅,高さ40の青いView配置
    UIView *blueView = [[UIView alloc] init];
    blueView.backgroundColor = [UIColor blueColor];
    blueView.translatesAutoresizingMaskIntoConstraints = NO;
    [self.view addSubview:blueView];
    NSLayoutConstraint *blueLeftConstraint = [NSLayoutConstraint constraintWithItem:blueView
                                                                             attribute:NSLayoutAttributeLeft
                                                                             relatedBy:NSLayoutRelationEqual
                                                                                toItem:self.view
                                                                             attribute:NSLayoutAttributeLeft
                                                                            multiplier:1
                                                                              constant:0];
    NSLayoutConstraint *blueRightConstraint = [NSLayoutConstraint constraintWithItem:blueView
                                                                              attribute:NSLayoutAttributeRight
                                                                              relatedBy:NSLayoutRelationEqual
                                                                                 toItem:self.view
                                                                              attribute:NSLayoutAttributeRight
                                                                             multiplier:1
                                                                               constant:0];
    NSLayoutConstraint *blueHeightConstraint = [NSLayoutConstraint constraintWithItem:blueView
                                                                            attribute:NSLayoutAttributeHeight
                                                                            relatedBy:NSLayoutRelationEqual
                                                                               toItem:nil
                                                                            attribute:NSLayoutAttributeNotAnAttribute
                                                                           multiplier:1
                                                                             constant:40];
    NSLayoutConstraint *blueTopConstraint = [NSLayoutConstraint constraintWithItem:blueView
                                                                        attribute:NSLayoutAttributeTop
                                                                        relatedBy:NSLayoutRelationEqual
                                                                           toItem:self.view
                                                                        attribute:NSLayoutAttributeBottom
                                                                        multiplier:1
                                                                          constant:-blueHeightConstraint.constant];
    [self.view addConstraints:@[blueLeftConstraint, blueRightConstraint, blueTopConstraint, blueHeightConstraint]];


3.self.viewのcenter座標に幅=self.view.frame.width/2 高さ=self.view.frame.height/2 の黄色Viewを配置
    UIView *yellowView = [[UIView alloc] init];
    yellowView.backgroundColor = [UIColor yellowColor];
    yellowView.translatesAutoresizingMaskIntoConstraints = NO;
    [self.view addSubview:yellowView];
    NSLayoutConstraint *yellowCenterXConstraint = [NSLayoutConstraint constraintWithItem:yellowView
                                                                            attribute:NSLayoutAttributeCenterX
                                                                            relatedBy:NSLayoutRelationEqual
                                                                               toItem:self.view
                                                                            attribute:NSLayoutAttributeCenterX
                                                                              multiplier:1
                                                                                constant:0];
    NSLayoutConstraint *yellowCenterYConstraint = [NSLayoutConstraint constraintWithItem:yellowView
                                                                               attribute:NSLayoutAttributeCenterY
                                                                               relatedBy:NSLayoutRelationEqual
                                                                                  toItem:self.view
                                                                               attribute:NSLayoutAttributeCenterY
                                                                              multiplier:1
                                                                                constant:0];
    NSLayoutConstraint *yellowWidthConstraint = [NSLayoutConstraint constraintWithItem:yellowView
                                                                             attribute:NSLayoutAttributeWidth
                                                                             relatedBy:NSLayoutRelationEqual
                                                                                toItem:self.view
                                                                             attribute:NSLayoutAttributeWidth
                                                                            multiplier:.5
                                                                              constant:0];
    NSLayoutConstraint *yellowHeightConstraint = [NSLayoutConstraint constraintWithItem:yellowView
                                                                              attribute:NSLayoutAttributeHeight
                                                                              relatedBy:NSLayoutRelationEqual
                                                                                 toItem:self.view
                                                                              attribute:NSLayoutAttributeHeight
                                                                             multiplier:.5
                                                                               constant:0];
    [self.view addConstraints:@[yellowCenterXConstraint, yellowCenterYConstraint, yellowWidthConstraint, yellowHeightConstraint]];


共通する部分としてViewのtranslatesAutoresizingMaskIntoConstraintsプロパティは必ずNOにすること。
これをしないとAutolayoutが適用されない。
Viewを作成する際にinitWithFrame:で幅と高さを指定しても意味はないのでNSLayoutConstraintのメソッドで幅と高さの制約を作る必要がある。
組み合わせや使い方によっては柔軟なものができそうであるが、それにしてもNSLayoutConstraintはマゾい
なので今度Masonryを試してみようと思う。
iOS7とiOS8でUIScreenのboundsのサイズが違うので対応する
背景
iOS8からUIScreenのboundsを取得すると端末の向きに応じてwidthとheightの値が変更されるようになりLandscape対応でちょっと困ったのでメモ
iOS7とiOS8で差分を埋める
+ (CGSize)mainScreenSize
{
    CGSize screenSize = [UIScreen mainScreen].bounds.size;
    if ((NSFoundationVersionNumber <= NSFoundationVersionNumber_iOS_7_1) &&  UIInterfaceOrientationIsLandscape([UIApplication sharedApplication].statusBarOrientation)) {
        return CGSizeMake(screenSize.height, screenSize.width);
    }
    return screenSize;
}
これでiOS7でもiOS8と同様のサイズを返すです。
重複件数まで取得できるNSCountedSet
背景
例えばこんな問題があったとする。
インプットした文字列の単語の重複件数を求めなさい。
例) banana
答) b: 1 a: 3 n: 2
この問題を何か効率的に処理できる方法はないかと考えたときにNSCountedSetを見つけたので使い方をメモ。
使い方
NSCountedSetはNSMutableSetのサブクラスなので当然、格納した際に重複しているものは取り除かれるのだが、取り除く際に重複のcount数を保持している。
なので上記の問題に対応するコードをNSCountedSetを使用して書くとこうなる。
    NSString *text = @"banana";
    NSCountedSet *countSet = [NSCountedSet set];
    int total = [text length];
    for (int i = 0; i < total; i++) {
        [countSet addObject:[text substringWithRange:NSMakeRange(i, 1)]];
    }
    for (NSString *word in countSet) {
        NSLog(@"%@:%@", word, @([countSet countForObject:word]));
    }
出力結果
b:1
a:3
n:2
ちょっと便利な気がするー。
git clone --recursive をするとサブモジュールも一緒に持ってきてくれる
背景
SDWebImageのDemoを動かしたくてgit cloneして動かしたらfile not foundでエラーになった。
解決方法
SDWebImageはサブモジュールを使用しているので、それも一緒に入れてやる必要がある。
なのでgit clone する際に --recursive オプションをつけてやるとサブモジュールも一緒に入れてくれる。
git clone --recursive https://github.com/rs/SDWebImage.git

Cloning into 'SDWebImage'...
remote: Reusing existing pack: 2754, done.
remote: Total 2754 (delta 0), reused 0 (delta 0)
Receiving objects: 100% (2754/2754), 3.64 MiB | 294.00 KiB/s, done.
Resolving deltas: 100% (1600/1600), done.
Checking connectivity... done.
Submodule 'Vendors/libwebp' (http://git.chromium.org/webm/libwebp.git) registered for path 'Vendors/libwebp'
Cloning into 'Vendors/libwebp'...
remote: Counting objects: 11978, done.
remote: Compressing objects: 100% (3941/3941), done.
remote: Total 11978 (delta 9284), reused 10570 (delta 8029)
Receiving objects: 100% (11978/11978), 4.53 MiB | 431.00 KiB/s, done.
Resolving deltas: 100% (9284/9284), done.
Checking connectivity... done.
Submodule path 'Vendors/libwebp': checked out '68e7901da53cbda6ec93ddf93e039346d3c6a531'
--recursiveを使っていきましょー。
SwiftのArrayとDictionaryの使い方
背景
基本的な言語仕様はふんわりと学んだので、今後多用するであろうArrayとDictionaryの使い方を調べたのでメモ。
Array サンプルコード
// immutableなString型の配列
let names: String[] = ["name5", "name2", "name1", "name3"]

//各データを取得
let name1 = names[0] //name5
let name2 = names[1] //name2
let name3 = names[2] //name1
let name4 = names[3] //name3

//各件数
names.capacity // 4
names.startIndex // 0
names.endIndex // 4
names.count // 4


// mutableなString型の配列
var programLang = ["Objective-C", "Java"]

// データ追加
programLang.append("Swift") // [Objective-C, Java, Swift]
programLang += "Python" // [Objective-C, Java, Swift, Python]

let addLang = ["Ruby", "PHP"]
programLang.extend(addLang) // [Objective-C, Java, Swift, Python, Ruby, PHP]
programLang += ["Scala", "JavaScript"] // [Objective-C, Java, Swift, Python, Ruby, PHP, Scala, JavaScript]

programLang.insert("ひまわり", atIndex: 0) // [ひまわり, Objective-C, Java, Swift, Python, Ruby, PHP, Scala, JavaScript]

// 配列の中身を逆順にする
programLang.reverse() // [ひまわり, Objective-C, Java, Swift, Python, Ruby, PHP, Scala, JavaScript]

// 配列内をソート(降順)
sort(programLang) { $0 > $1 } // [ひまわり, Swift, Scala, Ruby, Python, PHP, Objective-C, JavaScript, Java]

// 配列内をソート(昇順)
sort(programLang) { $0 < $1 } // [Java, JavaScript, Objective-C, PHP, Python, Ruby, Scala, Swift, ひまわり]

// programLang配列のインデックスが0,1,2のデータを取得
programLang[0...2] // [Java, JavaScript, Objective-C]

// programLang配列のインデックスが0,1のデータをCとC#にする
programLang[0...1] = ["C", "C#"] // [C, C#, Objective-C, PHP, Python, Ruby, Scala, Swift, ひまわり]

// 先頭にCがつく言語を取得
programLang.filter { $0.hasPrefix("C") } // [C, C#]

// 各言語データの先頭に Language: を付与
programLang.map { "Language: \($0)" } // [Language: C, Language: C#, Language: Objective-C, Language: PHP, Language: Python, Language: Ruby, Language: Scala, Language: Swift, Language: ひまわり]

// 指定インデックスに該当するデータ削除
programLang.removeAtIndex(0) // [C#, Objective-C, PHP, Python, Ruby, Scala, Swift, ひまわり]

// インデックス0,1,2のデータを削除
programLang[0...2] = []  // [Python, Ruby, Scala, Swift, ひまわり]

// 配列の最後に格納されているデータを削除
programLang.removeLast()  // [Python, Ruby, Scala, Swift]

// 全て削除
programLang.removeAll()  // []

// copyとunshare
// mutableな配列
var numbersA: Int[] = [1, 2, 3]
var numbersB: Int[] = numbersA
var numbersC: Int[] = numbersA.copy() // numbersAをcopy

numbersA[0] = 0
println(numbersA)  // [0, 2, 3]
println(numbersB)  // [0, 2, 3]
println(numbersC)  // [1, 2, 3]

// copyしたnumbersBをunshare()
numbersB.unshare()
numbersA[1] = 5
numbersC[0...1] = [6, 7]

println(numbersA)  // [0, 5, 3]
println(numbersB)  // [0, 2, 3] unshareしたので参照データでなくなった
println(numbersC)  // [6, 7, 3]
Objective-CのNSArrayと同じように使えるけど += で配列にデータを追加できたりsortが用意されていたりで柔軟で使いやすい印象。
Dictionaries サンプルコード
// 初期化
var personInfo: Dictionary = ["name": "hachinobu", "age": 28]

// データ追加
personInfo["sex"] = "man"

// データ取得
personInfo["name"] //  hachinobu
personInfo["age"]    //  28
personInfo["sex"]    //  man

// 格納件数
personInfo.count //  3

// keyの配列を取得
let keys: Array = Array(personInfo.keys)  //  [sex, name, age]

// valueの配列を取得
let values: Array = Array(personInfo.values) //  [man, hachinobu, 28]

// Dictionaryにnameというkeyでデータが格納されているかチェック、なければ追加する
if let name = personInfo["name"] {
    println("name is \(name)") //  name is hachinobu
} else {
    personInfo["name"] = "hachinobu"
}

// データ更新
personInfo.updateValue("nishinobu", forKey: "name")  //  [sex: man, name: nishinobu, age: 28]


// 既に存在するkeyならupdateで存在しないkeyであればinsertになる
if let age = personInfo.updateValue(29, forKey: "age") {
    println("update")
} else {
    println("insert")
}

// 追加
personInfo["height"] = 171 //  [age: 29, sex: man, name: nishinobu, height: 171]

// 指定したkeyのデータを削除
personInfo.removeValueForKey("height") //  [age: 29, sex: man, name: nishinobu]

// personInfoのようにvalueの型がOptionalでない場合はvalueにnilを入れると削除扱い
personInfo["name"] = nil //  [age: 29, sex: man]

// 下記のようにvalueの型がOptionalの場合にvalueにnilを入れるとnilが代入される
var optionalDict: Dictionary<String, NSObject?> = ["key1": "A", "key2": "B"]
optionalDict["key1"] = nil // [key2: B, key1: nil]
valueにnil入れて削除とか面白い
valueの型にOptionalを指定すると挙動が変わるので注意が必要
addSubviewやremoveFromSuperviewをトリガーにする方法
背景
addSubviewやremoveFromSuperviewしたタイミングでViewの処理をしたかったので色々調べてたら出てきたのでメモ。
方法
willMoveToSuperview:、didMoveToSuperviewメソッドを使用すれば良い。
willMoveToSuperview:
自身(UIView)が親Viewに追加される直前に呼ばれる。
引数のnewSuperviewには親Viewがはいってくる。
追加でなく削除される直前にもこのメソッドは呼ばれる。
削除の場合は引数のnewSuperviewがnilになる。
didMoveToSuperview
自身(UIView)が親Viewに追加された直後に呼ばれる。
追加でなく削除される直後にも呼ばれる。
サンプルコード
該当のメソッドを使った簡単なサンプルコード
WWDCで新言語 Swiftが発表された日にObjective-Cの日記を書いている…
何だか乗り遅れた感が…
Swift勉強するぞー!
CoreDataで集計関数を使う
背景
前回のNSExpressionを使って今度はCoreDataで集計関数を使用する方法を調べたのでメモ。
サンプル
下記のデータ構造とデータを格納しているSeminarsテーブルがあると仮定する。
Seminars
| date | seminar | charge |
|---|---|---|
| 2014/05/01 | SeminarA | 1,000 |
| 2014/05/02 | SeminarB | 1,500 |
| 2014/05/01 | SeminarC | 500 |
| 2014/05/03 | SeminarD | 2,000 |
| 2014/05/02 | SeminarE | 0 |
| 2014/05/01 | SeminarF | 0 |
日付ごとのセミナー件数を取得してみる。
NSEntityDescription* entity = [NSEntityDescription entityForName:@"Seminars"
                                          inManagedObjectContext:_managedObjectContext];

//集計対象カラムseminar
NSExpression *keyPathExpression = [NSExpression expressionForKeyPath:@"seminar"];
//集計関数countを指定
NSExpression *countExpression = [NSExpression expressionForFunction:@"count:"
                                                          arguments:@[keyPathExpression]];

//集計式の対象(NSExpressionDescription)
NSExpressionDescription *expressionDescription = [[NSExpressionDescription alloc] init];
[expressionDescription setName:@"seminarCount"];
[expressionDescription setExpression:countExpression];
[expressionDescription setExpressionResultType:NSInteger32AttributeType];

[searchFetchRequest setPropertiesToFetch:@[@"date", expressionDescription]];
//Group By
[searchFetchRequest setPropertiesToGroupBy:@[@"date"]];

NSSortDescriptor *sortDescriptor = [[NSSortDescriptor alloc] initWithKey:@"date" ascending:YES];
[searchFetchRequest setSortDescriptors:@[sortDescriptor]];
[searchFetchRequest setResultType:NSDictionaryResultType];
NSArray *fetchedObjects = [_managedObjectContext executeFetchRequest:searchFetchRequest error:nil];

NSLog(@"出力結果:%@", fetchedObjects);
出力結果
({
    date = "2014/05/01";
    seminarCount = 3;
},
{
    date = "2014/05/02";
    seminarCount = 2;
},
{
    date = "2014/05/03";
    seminarCount = 1;
})
ごちゃごちゃと面倒な印象。
やはりMagicalRecordを使うべしですかね。